A blog which discusses various GPU applications including visualization, GPGPU and games.

Friday, May 22, 2009

C++0x Lambdas

I recently installed the VS2010 beta so I could experiment with some of the new C++0x features. In this post, I would like to cover a few simple lambda examples.

Let's start off simple - without lambdas. Suppose we have a vector allocated for 100 floats, and we want to fill it up with random numbers in [0,1). The most obvious way is to use a looping construct of some kind.

vector<float> vec(100);

for (unsigned int i = 0; i < 100; i++)
{
vec[i] = static_cast<float>(rand()) / (static_cast<float>(RAND_MAX) + 1.0f);
}

Okay, I realize I didn't need that many casts, but I like being safe. ;) While this code does the job, we can also use std::generate() to avoid the explicit loop construct:

float randval()
{
return rand() / (RAND_MAX + 1.0f);
}

vector<float> vec(100);

generate(vec.begin(), vec.end(), randval);

Looks fine, right? What can we possibly do differently? We can use a lambda:

vector<float> vec(100);

generate(vec.begin(), vec.end(), []() -> float
{
return rand() / (RAND_MAX + 1.0f);
});

Now consider the slightly more complicated example where we have two vectors and want to produce a third vector from them. We can use a variant of std::transform() to do this.

We have vectors invec1 and invec2, and want to produce outvec which is simply the elementwise product of invec1 and invec2.

First try:

float product(float x, float y)
{
return x * y;
}

transform(invec1.begin(), invec1.end(), invec2.begin(), outvec.begin(), product);

Second try:

transform(invec1.begin(), invec1.end(), invec2.begin(), outvec.begin(), [](float x, float y) -> float
{
return x * y;
});

Another application for lambdas is to use one as a sort predicate:

sort(vec.begin(), vec.end(), [](float x, float y) -> bool { return x > y; });

Don't forget, we can always assign a lambda to a variable to clean things up a little:

void somefunc()
{
auto f = [](float x, float y) -> bool { return x > y; };
sort(vec.begin(), vec.end(), f);
}

Now for some code to put it all together:

vector<float> vec(10);

// Fill up the vector with random numbers in [0,1)
generate(vec.begin(), vec.end(), []() -> float { return rand() / (RAND_MAX + 1.0f); });

// Sort the vector in descending order
sort(vec.begin(), vec.end(), [](float x, float y) -> bool { return x > y; });

// Print the vector
copy(vec.begin(), vec.end(), ostream_iterator<float>(cout, " "));
cout << endl;

Monday, May 4, 2009

Windows 7 APIs

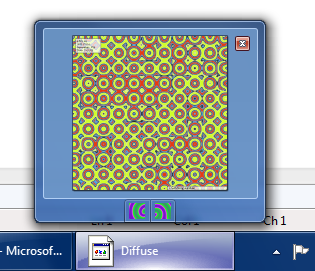
Windows 7 introduces a number of new APIs. In this post I would like to focus on ITaskbarList3. With this interface, it is possible to turn your application's taskbar button into a progress bar, as well as control what shows up as the thumbnail preview. It is even possible to add buttons to the preview window, as depicted below.


The code to add the buttons is quite simple:


DWORD dwMask = THB_TOOLTIP | THB_BITMAP;
THUMBBUTTON tbhButtons[2];
wstring btn1 = L"Button 1";
wstring btn2 = L"Button 2";

tbhButtons[0].dwMask = dwMask;
tbhButtons[0].iId = 0;
tbhButtons[0].iBitmap = 0;
tbhButtons[0].szTip[btn1.length()] = L'\0';
btn1.copy(tbhButtons[0].szTip, btn1.length());

tbhButtons[1].dwMask = dwMask;
tbhButtons[1].iId = 1;
tbhButtons[1].iBitmap = 1;
tbhButtons[1].szTip[btn2.length()] = L'\0';
btn2.copy(tbhButtons[1].szTip, btn2.length());

ITaskbarList3 *ptbl;
CoCreateInstance(CLSID_TaskbarList, NULL, CLSCTX_INPROC_SERVER, IID_PPV_ARGS(&ptbl));

ptbl->ThumbBarAddButtons(g_hWnd, ARRAYSIZE(tbhButtons), tbhButtons);

HIMAGELIST imglist = ImageList_LoadImage(NULL, L"btns.bmp", 16, 0, CLR_NONE, IMAGE_BITMAP, LR_LOADFROMFILE | LR_CREATEDIBSECTION);
ptbl->ThumbBarSetImageList(g_hWnd, imglist);

Tuesday, April 28, 2009

More Reaction-Diffusion!

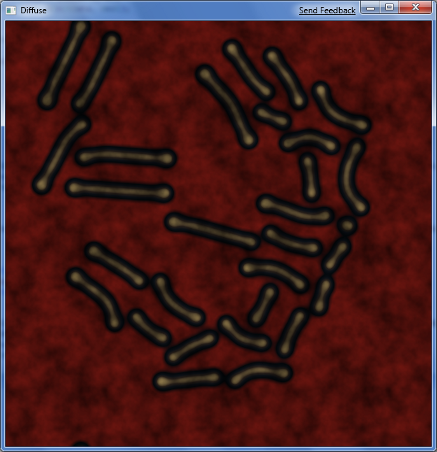
I am adding stylized shaders to the reaction-diffusion program:


Friday, April 24, 2009

Reaction-Diffusion

I have recently gotten into partial differential equation (PDE) visualization. In particular, I am focusing on a set of PDEs known as reaction-diffusion systems. These systems have two important terms: a reaction term, and a diffusion term (Laplacian).

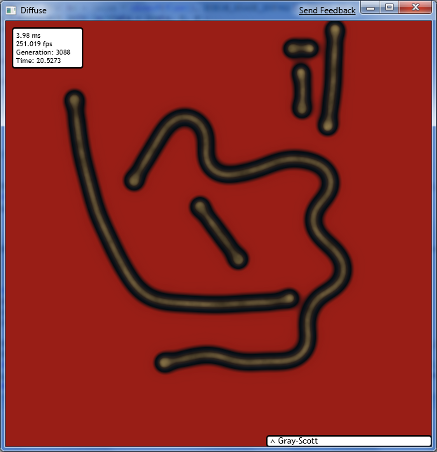
One such reaction-diffusion model is the Gray-Scott model. Below is a screenshot from my visualization program, which is applying a palette on the GPU.


The Gray-Scott model can be estimated by trivial numerical methods such as the finite difference method. Because of this, it is very easy to parallelize, which means implementing it in a compute shader, OpenCL or CUDA is a simple task. I have a compute shader solver written, which will be accelerated by D3D11 hardware when it is available. I will share more details in an upcoming post.

Monday, March 9, 2009

D3D11 Stream Types

I have been wanting to cover more of the specifics on the new stream data types in upcoming Direct3D 11. Essentially what these types enable you to do is emit data without having to worry about order. That is, these are unordered data types; order is not preserved.

One application of the structured buffer stream types is emitting pixel data in a structure, from the pixel shader. In this scenario, it is necessary to determine how many structures are emitted - luckily, this can be manipulated without ever reading back from the GPU. D3D11 provides the CopyStructureCount method, to copy the number of written items into a buffer. That buffer can then be used with any of the draw indirect methods.

Saturday, February 21, 2009

Image Convolution

One of the most commonly performed image post-processing effect is the image convolution. A number of tricks are employed to make convolutions more efficient on the GPU, such as using separable convolutions, upscaling a smaller image to fake a blur convolution, etc.

The problem with using the pixel shader to perform convolutions is the redundant texture fetching. Imagine the convolution window being slid to the right by one pixel: each time, there is a large overlap in texture fetches. Ideally, we should be able to fetch the information from the texture once, and store it into a cache. This is where compute shaders come in.

Compute shaders allow access to "groupshared" memory: in other words, memory that is shared amongst all of the threads in a group. Essentially what we can do is fill up a group's shared memory with a chunk of the texture, synchronize the threads, and then continue with the convolution. Only this time, we reference the shared memory instead of the texture.

In a future post, I will provide a more complete example. But for now, I will outline the two methods:

Method A: Pixel shader

Texture2D<float> img;

float result = 0.0f;

int w2 = (w - 1) / 2;
int h2 = (h - 1) / 2;

for (int j = -h2; j <= h2; j++)
{
for (int i = -w2; i <= w2; i++)
{
result += img[int2(x + i, y + j)] * kernel[w * (j + h2) + (i + w2)];
}
}

return result;

Above, x and y represent the position of the pixel being processed, while w and h are the width and height of the convolution kernel.

Method B: Compute shader

Texture2D<float> img;
RWTexture2D<float> outimg;

groupshared float smem[(BLOCKDIM + 2) * (BLOCKDIM + 2)];

// Read texture data into smem for this group

// Synchronize the threads
GroupMemoryBarrierWithGroupSync();

float result = 0.0f;

for (int j = 0; j < h; j++)
{
for (int i = 0; i < w; i++)
{
result += smem[offset + (BLOCKDIM + 2) * j + i] * kernel[w * j + i];
}
}

outimg[int2(x, y)] = result;

Here, BLOCKDIM is the width (and height) of threads in a group, and offset is an offset into shared memory, which is a function of the thread ID within a group.

The compute shader method substantially reduces the number of redundant fetches necessary compared to the pixel shader method, especially when using an inseparable kernel.

Friday, February 6, 2009

DirectWrite Text Layouts, Part 2

In my previous post, I briefly covered DirectWrite text layouts. In this post, I would like to go into greater depth.

A text layout essentially enables you to describe many aspects of the contents of a string - text size, text style, text weight, custom drawing effects, inline objects, etc. The methods provided by a text layout enables you to apply specific formatting to specific ranges of text.

To backtrack a little bit, there are multiple ways of rendering text with Direct2D and DirectWrite. The first way, a way which I consider to be at the highest level of abstraction, is the DrawText method provided by a Direct2D render target. This method can be used to draw simple text that requires no extensive formatting. This method does not take a text layout object at all, but instead a simpler text format object.

The second way, which I consider to be mid-level, is the DrawTextLayout method (again provided by a Direct2D render target). This method takes a text layout object and renders it.

The third way, which I consider to be the lowest level, is the Draw method provided by a DirectWrite text layout object. This Draw method takes a custom class (a class which implements the IDWriteTextRenderer class) and uses its callbacks to render. This may seem complex, but it is actually trivial to write a class which acts just like DrawTextLayout does in Direct2D.

I would first like to focus on the lowest level method, since it excites me the most. Using this method, the text rendering possibilities are truly endless. The IDWriteTextRenderer interface defines six functions. I am going to focus on the DrawGlyphRun method in this post.

When the Draw method is called on the text layout object with a custom class, it will call the class's DrawGlyphRun method for contiguous sets of glyphs that have similar formatting. You may be wondering how you are supposed to write a pass-through function that simply renders the glyph run it receives - simple! Direct2D provides a render target method also called "DrawGlyphRun" which is the absolute lowest level glyph rendering function that handles ClearType.

Obviously, this is not a very interesting thing to do; this is basically what Direct2D's DrawText and DrawTextLayout use. An example on MSDN illustrates a more interesting use of a custom renderer. What they have essentially done is retrieved the glyphs' geometric information, and used Direct2D's draw/fill geometry methods.

This brings me to another interesting use case: writing a custom rendering class to "suck out" the geometry from glyphs. This can be done to create vertex buffers for Direct3D for extruded text, as done in this example.

As I mentioned earlier, it is possible to apply custom drawing effects to ranges of text. The way this works is simple: an application-specific object and text range are provided to the SetDrawingEffect method of the text layout object. The object provided is passed to the application-defined DrawGlyphRun method. The data can then be used in any way imaginable. Think brushes, stroke styles, transformation matrix effects, etc.

You may be thinking: is it necessary to write a pass-through custom renderer just to use different brushes as drawing effects? The answer is no - the implementation provided by Direct2D's DrawTextLayout interprets drawing effects as brushes!

Followers

Contributors